Tuesday, March 31, 2009

Venice Canal WIP 5 (work in progess)


Here in Step 5 of my watercolor pour painting, I've begun to work back into it with a brush.. the pouring may be over (although one never knows.. I may feel I need to do another pour or two before I am satisfied!). I like how the water in the foreground is coming together, although the rest of it needs a lot of work. My intention when I started this piece was to keep it very loose and abstract, and I've lost that idea somewhere along the way. I'm not crazy about what's happening here, so I am going to attempt to loosen it up again with some large areas of washes and try to play with color and perspective in the buildings and bridge. Stay tuned for the next episode!

"Venice Canal" WIP 4 (work in progress)


Here I removed all the Friskett (using a rubber cement pick up) and this is what I was left with. A lot of the rich colors were sitting on the Friskett, and have now been rubbed away! :-( HOWever, have no fear( I am telling myself), I am now going to work back into the piece with a brush and try to have some fun with it, deepening the colors and putting in some details. I would like to abstract it a little with wide washes of color.... we'll see what happens as I get into it.... stay tuned.
14" x 18" on Arches 140 lb cold press paper

Monday, March 30, 2009

"Venice Canal" WIP 3 (work in progress)


Here is Stage 2 of my watercolor pour painting. Ditto from yesterday... colors getting richer and deeeper, and more Friskett is covering the previous pours. (See windows on building on left) More tomorrow....
14" x 18" on Arches 140 cold press

Sunday, March 29, 2009

"Venice Canal" WIP 2 (work in progress)

14" x 18"
Here is Stage 2 of my Venice watercolor pour painting. here I masked out the areas I wanted to remain after the first pour, and did the 2nd pour, wetting my paper with water first, and pouring in the same order of colors as yesterday. Keep in mind, the Friskett can not stay on the paper for too many days or it will be idfficlut to remove, so when I start a pour project, I plan to finish it withina couple of days. I'm liking what's happening in the water in the foreground.... and hope I can keep that pretty close to what it is now by the time I am done. More tomorrow!


Saturday, March 28, 2009

"Venice Canal" WIP 1 (work in progress) 14" x 18"

Here is the first of a demo I did for my watercolor class. I lightly drew out my design, a canal scene from a photo I took in Venice.. a typical scene, but one I've been wanting to work with in some medium... so i decided this was as good an opportunity as any.
After stapling then taping my Arches 140lb paper to a board, and mapping out my design with pencil, I blocked out the areas I wanted to remain white with Friskett. Then I had fun pouring the paint. I first wet the paper with a wide brush, (I work over my sink) , and then begin the pouring process, starting with DaVinci Hansa Yellow, then Da Vinci Red Rose Deep, and finally Da Vinci Phthalo Blue. (i mix up a small batch of each in plastic cups with water, and in each consecutive pour throughout the process I blend ina little more paint so it's deeper in color). I let them run together, I tip the board in whatever direction necessary to move the paint where I want it to go. I keep a paper towel handy to keep things clean and wipe up drips on the edges of the board. Then I am careful to let the paper dry, first laying it flat, and eventually standing it upright, watching it until I know it's dry enough that it won't run together in places i don't want it to... Stayed tuned for the next stages in the next few days... Thanks for stopping by!

Wednesday, March 18, 2009

"Ode to Matisse"

13" x 18" Watercolor on Arches paper

This was a demo peice I did for the Tuesday morning watercolor class I teach. It was based on a Matisse landscape, which staretd very simple and loose. I sort of went wild with it .. using Friskett to block our areas and just enjoying the process of using transparent washes of "Matisse" colors... hope you enjoy.

Below are the stages as this watercolor evolved.


Stage 1
To get started, I wet the paper, front and back, taped it to my board, and "stained it" .


Stage 2
Here I began to work into the painting with transparent washes, defining the landscape. After the paint dried, I worked into it with Friskett, masking out areas that i wanted to remain light.


Stage 3
At this stage, I had already worked abck into it with paint, and removed the Friskett (a fun process!) and was left with this. I worked back into it to bring in more darks and definition.. but I like how it looked at every stage. Unfortunately, as it is with art.. the early stages are now gone forever, buried under the final painting. Thank God for digital cameras and giclee prints!


Tuesday, March 17, 2009

"Chincoteague Morning"

16" x 20" , Oil

And another from my studio clean -out that I thought I'd share..


Monday, March 16, 2009

"Tuscan Bales"

9" x 12", Oil

This another painting from my recent studio clean-out that's now in a show at the Chentini Gallery, Chagrin Falls, OH. It was a painting that I liked that I liked and thought I'd keep for myself, to remind me of driving through Tuscany, but afte a year or so in my studio, unhung, I decided it was time to offer it for sale. Hope you enkoy.. or contact the gallery for purchase information.


"When in Rome"


This scene is from a trip a couple of summers ago to Rome. The wonderful cafes and umbrellas, not to mention earth tones in the cityscapes are perfect painting subject matter...
20" x 20" , Oil

Sunday, March 15, 2009

"After Mardi Gras"


Just cleaning out my files and found this older painting ... and thought it apropos for this time of year....
For other New Orleans paintings or prints, please check out my eBay store by follwoing the link on the right of this page.
11" x 14" ,Oil

Saturday, March 14, 2009

"Alexa" WIP 4 (Work in Progress)

Stage 4
Still working on it (see previous posts!)

"Alexa" WIP 3 (Work in Progress)


Here is the next installment of my portrait of my daughter. I still need to work into the background and decide how to handle the lower portion of her clothing, but you can see the progress I've made since the last blog. I worked into the face to bring in lighter tones, while leaving some of the original darker shadows to show through. I still need to go back in to those shadows just a bit, and still have an "issue" with the eye on the right... but it's starting to be a pretty good likeness of Alexa. The nice thing (and frustrating thing,too) about doing a live portrait of a face you know well, is that whatever is wrong with your painting is clearly evident to you and your family! We all realize that the distance between Alexa's eyes and the length of her nose is a little too long. She is posing for me again starting Monday, so I'll attempt to correct that in the next
portrait.. ya live and ya learn......


18" x 24" pastel on board

Friday, March 6, 2009

"Alexa" WIP (Work in Progress)


18" x 24" Pastel on pastel board


My 18 year old daughter posed for my Monday Portrait painting group, which was especially delightful for me.. it forced her to sit for 3 hours so I could work on a good , long painting of her! She'll sit for three sessions... so I have the chance to take my time and build it up slowly, and get into fairly good detail. Stage one is my charcoal rendering where I simply place the subject on the board, make decisions about composition,and try to accurately render the features. Stage two shows how I layed in color with pastels, working in the dark values, and then beginning to lay in some of the lighter tones, so I can gauge how light and how dark I'll eventually work into the peice. There was a stage in between these two, where after laying down some dark blue and purple tones, simply focusing on the shadows, I took a wet sponge and scrubbed into the painting, lightly smearing the pastels around, giving me a nice smoothe base of shadows that became more permaanant on the board. This allowed me to work back into the sandy-textured board with fresh pastels... ready to accept more pigment into the tooth. Stayed tuned for the next stages... I can't wait for Alexa to sit still again!


Thursday, March 5, 2009

"Chincoteague Fugue"

One more example of a precious little ACEO.. Art Card Edition & Original, that have become highly collectable.. not to mention, affordable in these tough economic times. People still crave art... and these ACEO's provide a way to bring a little something special into your home.

Size: 2.5" x 3.5 " on Arches watercolor paper.

Wednesday, March 4, 2009

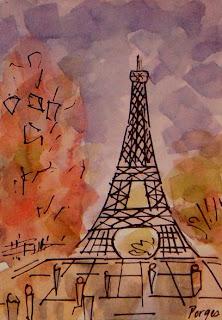
"Paris Jewel"

2.5" x 3.5" Watercolor on Arches paper

And another of my ACEO's... a precious little watercolor and pen & ink drawing .. an afforable mini collectable, you can find in my eBay store.


Tuesday, March 3, 2009

"Storm over Assateague"
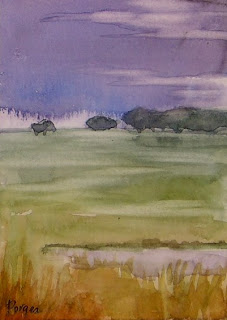

Here is another one of my ACEO's , a mini watercolor (2.5" x 3.5"), These little works of art have become quite popular over recent years for their affordabilty, precious size, and beauty. Click on the link at the right to check out my orrerings in my eBay store.

Monday, March 2, 2009

Assateague Spring
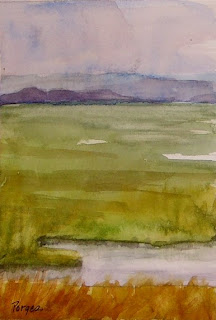

With these tough economisc times, I've been selling more of these precious little collectable ACEO's.. miniature paintings (2.5" x 3.5") which have become very popular. They are mini watercolor versions of some of my larger oil paintings... and are as much fun for me to do as they seem to be for people to collect. Please click on the link on the right to my eBay store to see the ACEO's I have available.