I haven't posted anything on my blog since last spring.... life has been good and busy! VERY busy!! So, after 5 art shows, lots of painting commissions, a crazy-busy season of freelance work, hosting a milestone surprise party for my sister, a high school graduation party for my daughter, a wedding shower for my neice, and getting my daughter off to college... Ahhhhhhhhh.. I have some time to myself again!! Please check out my website to see details of what I've been up to.
Thanks for stopping by!
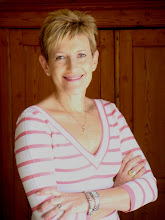
"Rose", oil
11"x14"
In honor of Breast Cancer Awareness Month, and my recent show of my series entitled,
"You're Not Your Hair, A Survivor's Story",
this is MY story.....
My story began 7 years ago on the eve of my 45th birthday. I had gone in for a routine mammogram the week before, and it showed what the radiologist called a “slight shadow”. Although I was told it was probably nothing, I called my doctor for her opinion. Thank god she told me to go in for further testing, and after a week-long wait, my doctor called to give me the results… I had breast cancer. I remember standing alone in my kitchen, feeling like the air was just sucked out of the room. Getting that diagnosis was something surreal. Over the next months, I went through a whole gamut of emotions… fear for my life; the overwhelming sadness at the thought that I may not be here for my children as they grow into adults, or be here to grow old with my husband; guilty that I had to upset my family with this news, after having gone through it years before with one of my sisters (how could this be happening to me, too?); upset at the way this illness turned my life upside down; shock as I heard the choices I had for treatment; anger that my work and daily routine had to be put on hold so I could focus on my health… and the ultimate salt to the wound, was when I heard after my lumpectomy that I would still need chemotherapy and radiation, and that yes…I would most definitely lose my hair.
The strawberry blonde, curly hair that I had as a child was always the subject of admirers and I was often treated to at-home beauty shop sessions by my two older sisters. As a teenager, I grew it long to my waist (and sat under the hairdryer for hours to make it straight!) and when the blonde started to lose its glow, you can bet I began highlighting it. In college I cut it short (curly was finally cool!), and as an adult, I let the curls grow long again. Although I hate to admit it, and never realized it before, as a woman, my self image was always all about my hair. So, although having cancer meant that I could lose my life, the thought of losing my hair, in the midst of all those other emotions, was something almost unbearable for me.
On the 10th day after my first Chemo treatment, as they said it would, my hair started falling out. It first fell out in a few strands, then bigger clumps, until a few days later when I was so uncomfortable with it; I got in the shower and literally washed it all away. I was so shocked and upset at the sight of the mound of hair in my hands; I stood there and just cried my eyes out. I reluctantly showed my husband the new me, and he said something that was so true and profound, it dried my tears and put everything in perspective for me. He said, “You’re not your hair… You’re a mother and a wife, you’re a sister and a daughter, you’re an aunt, you’re a friend, and you’re an artist. You are so much more than just your hair”. Those words resonated deeply, and I knew he was right. I embraced my baldness and in an odd way, never felt more beautiful. Today I am so thankful for having gone through the experience. It was empowering. I now know for certain that I am not my hair… I am alive, and I am so much more.
This series of paintings is a tribute to all the beautiful women of different ages, races and walks of life, who have also been empowered by the opportunity to see who they really are and what they are truly made of. Cancer does that to you. So does the treatment for it. After all, we‘re not our hair…. we are so much more.
 9"x 12"